Enhance the webinar experience with OBS and Streamyard
- SHARE ON:


Click2View’s lead producer Alex Chua demonstrates how to use platforms Streamyard and Open Broadcaster Software to create a custom look for your virtual events.
The post-pandemic future is digital, especially when it comes to events. To keep things onscreen fresh for the audience, event organisers are turning to online tools such as Streamyard and Open Broadcaster Software to provide a premium webinar experience.
In this tutorial, we will be showing you how to use these platforms together to enhance your next webinar.
Streamyard is a popular platform used to host live streaming events. Open Broadcaster Software (OBS) is an open source streaming and recording programme that also functions as a “visual mixer”. We can feed a web of camera inputs, capture links and play out .mp4/.mov files as sources through OBS.
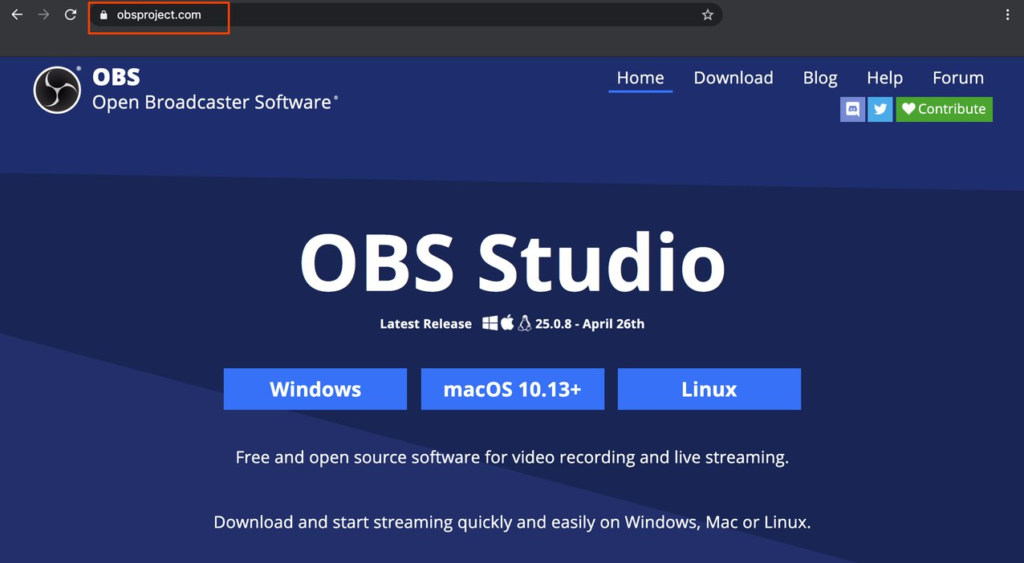
Step 1: Download the OBS application
If you don’t already have the OBS software installed, head over to obsproject.com to download the free application for your computer’s OS. For this tutorial, we will be using the Mac version. Since OBS is a visual mixing software, it offers users full control over functions like scaling, design, movement and the incorporation of overlays.
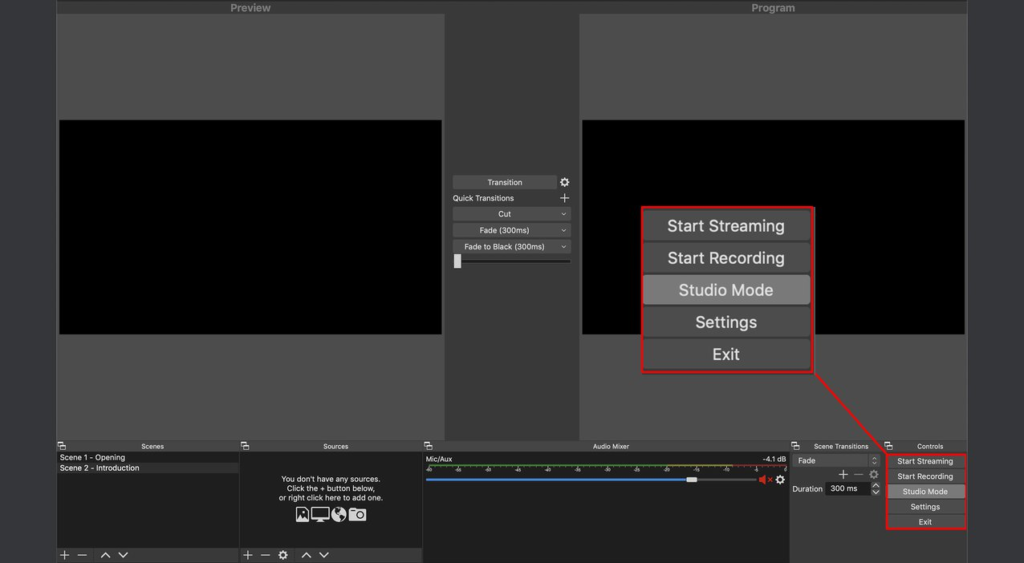
Step 2: Switch to Studio Mode and add your scenes
After launching the application switch your screen to Studio Mode via the toolbar on the bottom right hand corner. Once in studio mode, you will be able to set up scenes (such as your composition or pre-designed templates) that will be shown on the left screen (‘Preview’). You can set up as many scenes as you want — there are no limits to the number of scenes you can add.
Step 3: Importing image overlays
Images can be overlayed onto your scene to create a background, but do note that instead of importing your images, OBS links them to your computer.
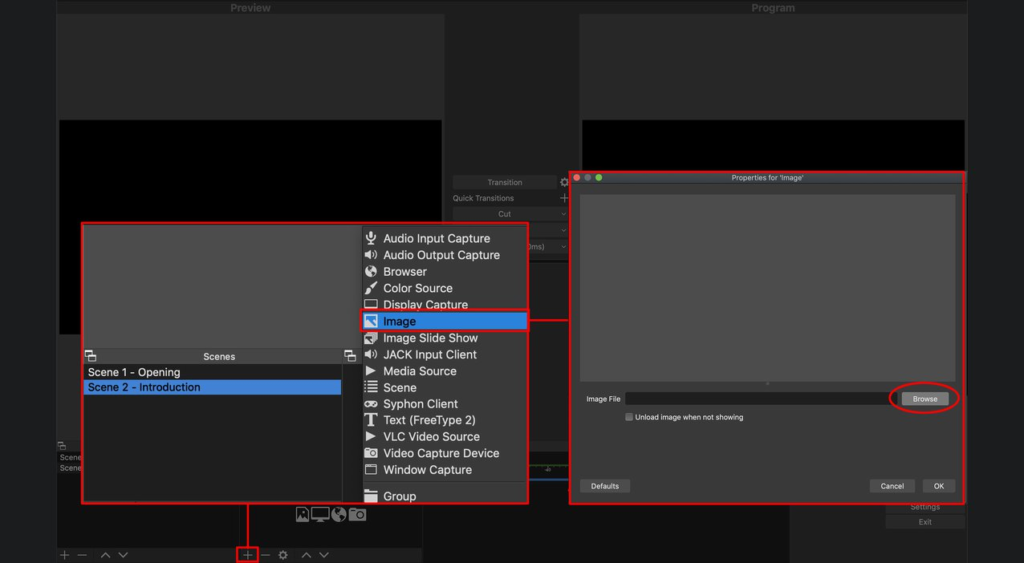
If the location of the image file on your computer is changed, the scene as shown on OBS will simply turn into a black screen because it can no longer locate the file’s whereabouts.
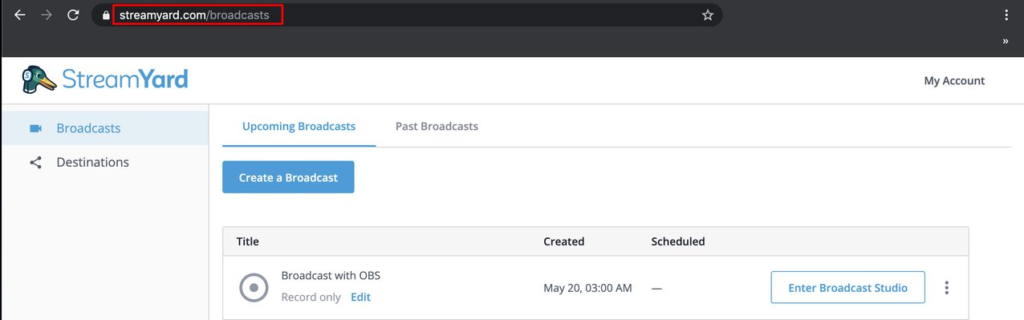
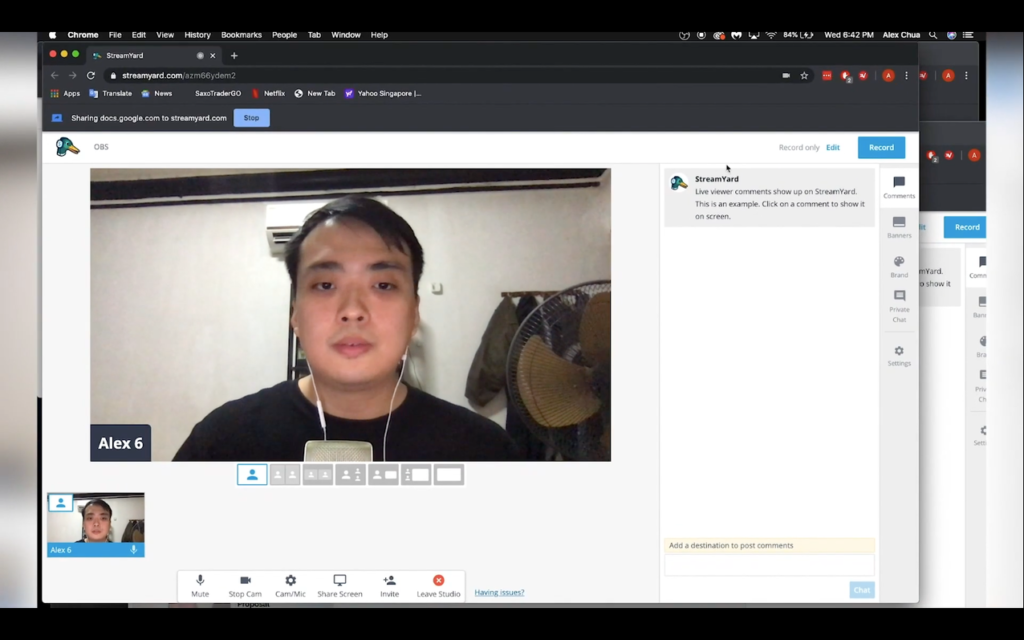
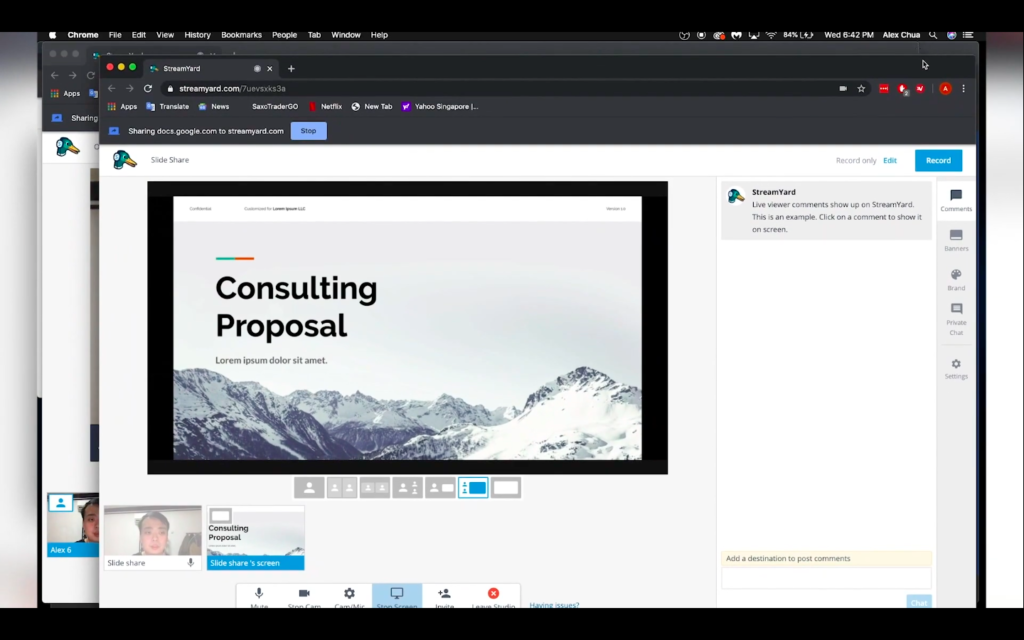
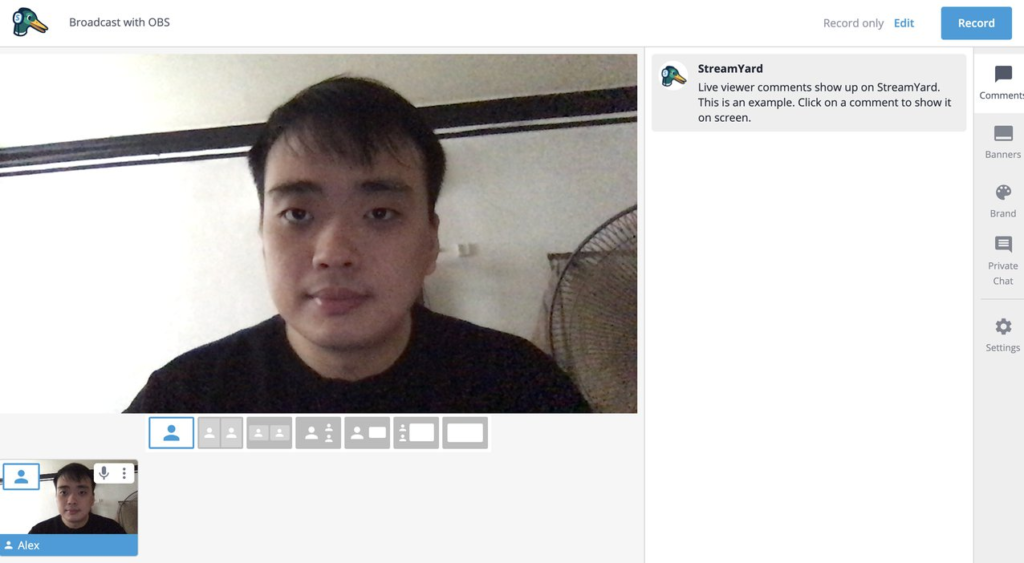
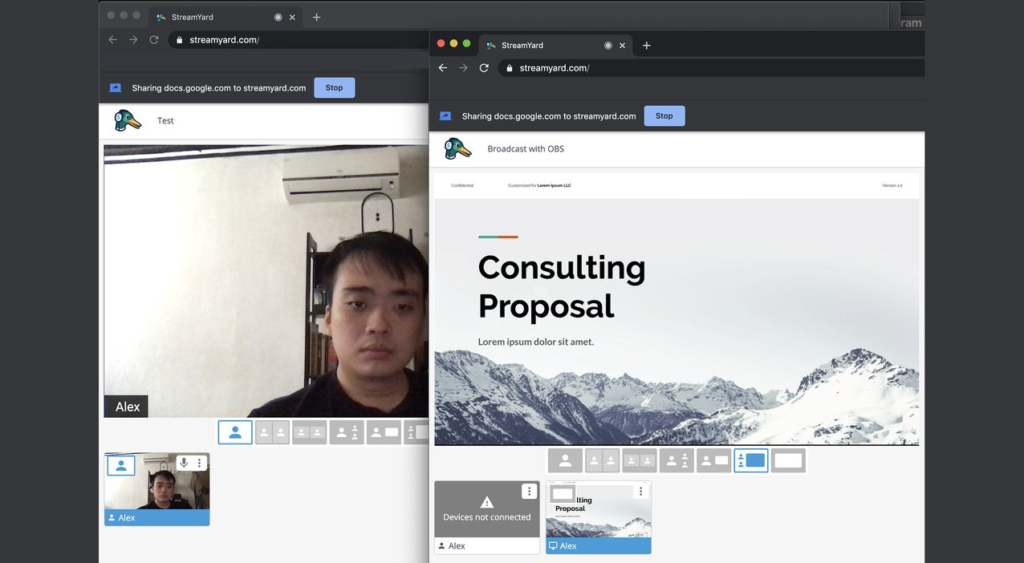
Step 4: Open Streamyard to capture your video feed
For a webinar that is being hosted remotely, where the speakers are based in separate locations, the video feed of the speakers will be captured through a platform like Streamyard. One key Streamyard feature is that it allows us to open multiple sessions at once.
For a webinar speaker presenting with slides, you will need two sessions: one for the video feed of the speaker and another to enable the screen sharing of the slides. Remember to open these two sessions in different browser windows.
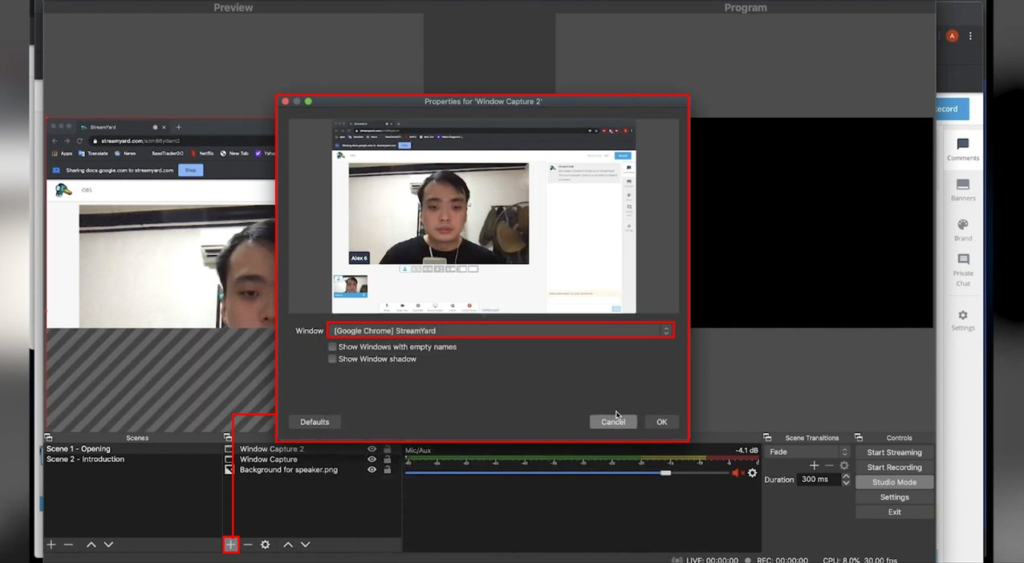
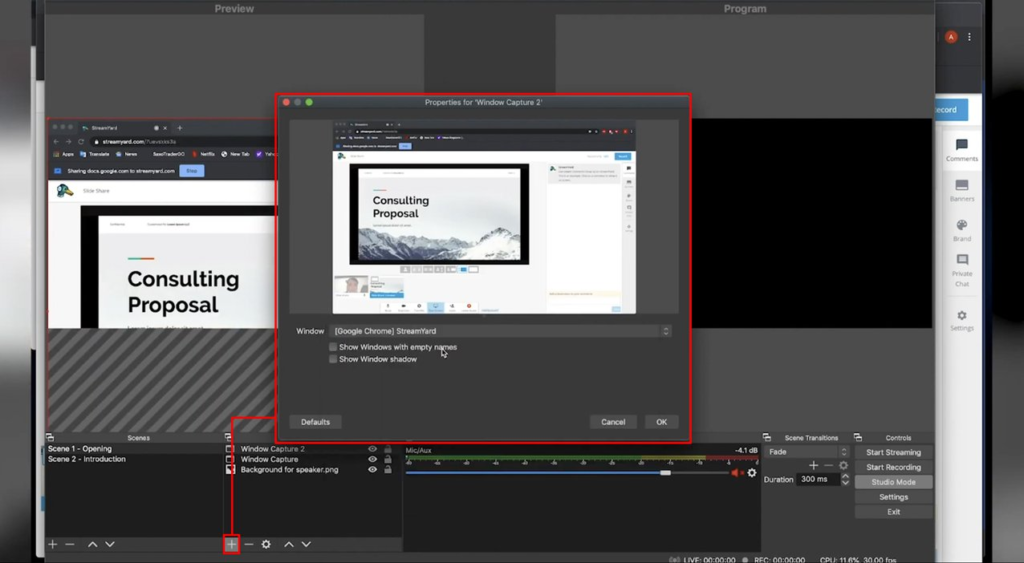
Step 5: Add the streams as inputs into OBS
Once that is set up, we can feed the video streams back to OBS by adding them as separate input sources. This is why both sessions need to be in different browser windows: they fall under the category of ‘Window Capture’, so if you have them both in the same window but different tabs, you won’t be able to feed both streams at the same time.
Step 6: Crop, resize and layer your scene
To crop your scene to fit into the background that you have selected, simple hold down the ‘ALT’ button and drag the red boundaries of your video feed. You can also scale them down by dragging the corners, and move them around your screen to wherever you want.
These two video feed layers can also be arranged one on top of another, the same way you would in Photoshop.
Step 7: Choosing transitions
On the right, the ‘Program’ screen shows what is actually live at any particular moment of your webinar. In the centre of the OBS application window there are preset transitions that you can choose from. There are three options available: a hard cut, a fade and a fade-to-black.
Step 8: Audio up!
Let’s move onto setting up the audio.
To capture a conversation from Streamyard (or any other video conferencing platforms), OBS needs to recognise an audio source on the computer. This simply means that the audio from your computer speaker needs to be routed back to your computer microphone. To do that, we will be using this software called iShowU Audio Capture. After downloading the installer according to your OS version, follow the instructions on the webpage to set it up.
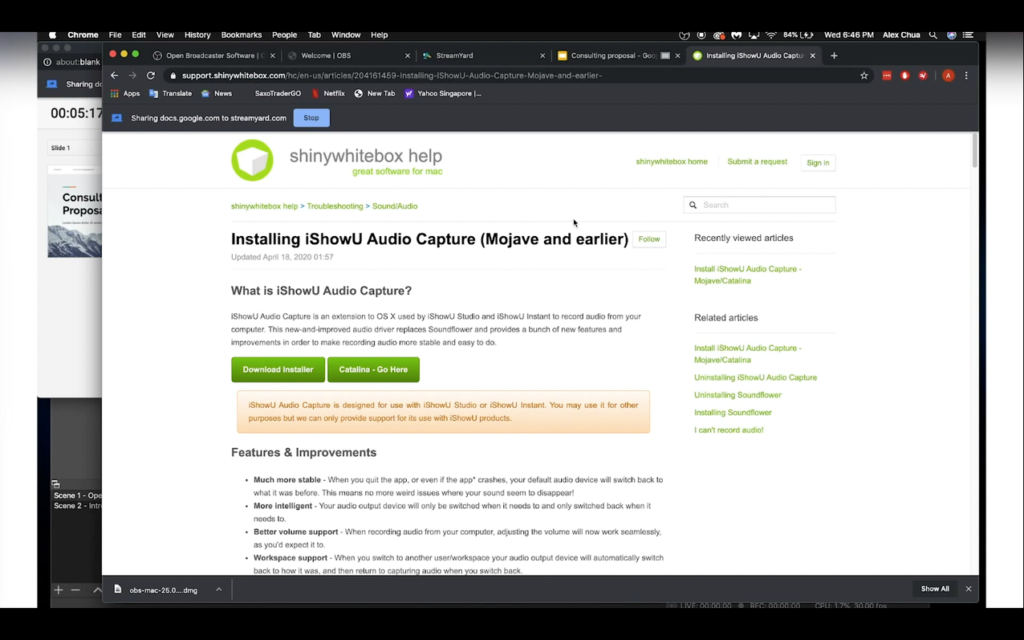
Back in the OBS application, under the audio mixer toolbar near the bottom of the window, toggle your audio source by clicking on the cog wheel button and selecting ‘Properties’.
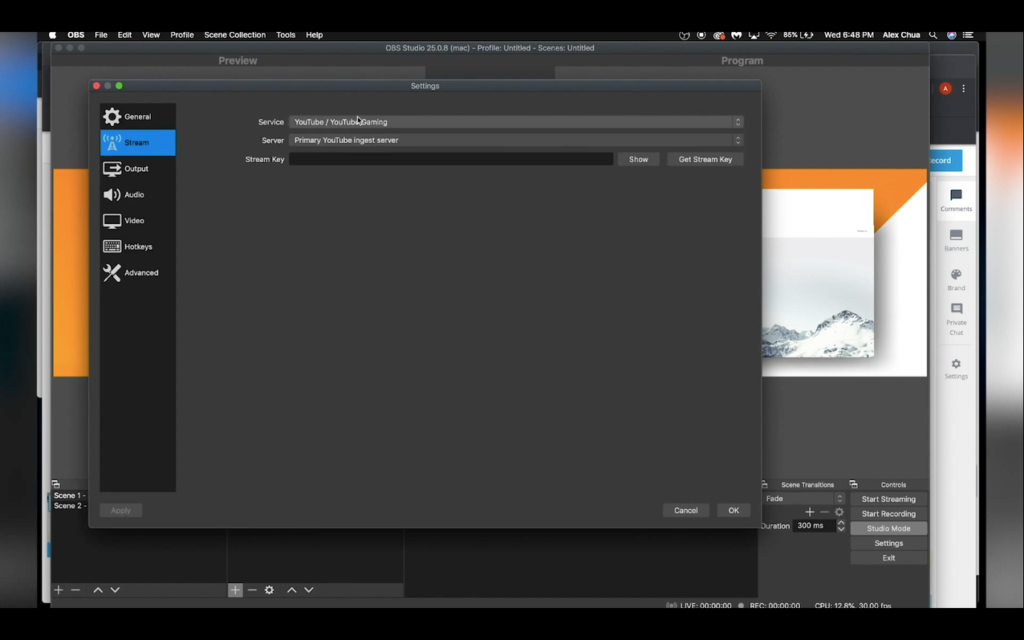
Step 9: Setting up the livestream
To set up the livestream, use the ‘Settings’ button on the bottom right hand corner and head over to the ‘Stream’ tab. Select the service that you want to broadcast on. Don’t worry, there is a wide variety of options to choose from. If you’re streaming on a service like YouTube, you will be provided with a stream key. Simply input your stream key into the bar.
Step 10: Going live in… 3, 2, 1
All that’s left to do is to press the ‘Start Streaming’ button on the bottom right corner of the OBS application and you’re ready to go.
As virtual events become much more prolific in the coming future, it can be immensely useful to know how to use online tools like these to enhance your webinar experience for your audience.
Have an idea for your next virtual event? Let us help. Speak to our CEO Simon Kearney at [email protected] today.
Read more from Click2View:
- Want some more webinar reading? We cover everything you need to know.
- New to videos? Try these DIY video tools.
- Resuming filming? Here are some tips to shoot safely.
Sign up to our newsletter for more.
Click2View is Southeast Asia’s premiere full-service independent B2B content marketing agency servicing clients like Microsoft, Google, Visa, Prudential, and the Lee Kuan Yew School of Public Policy.